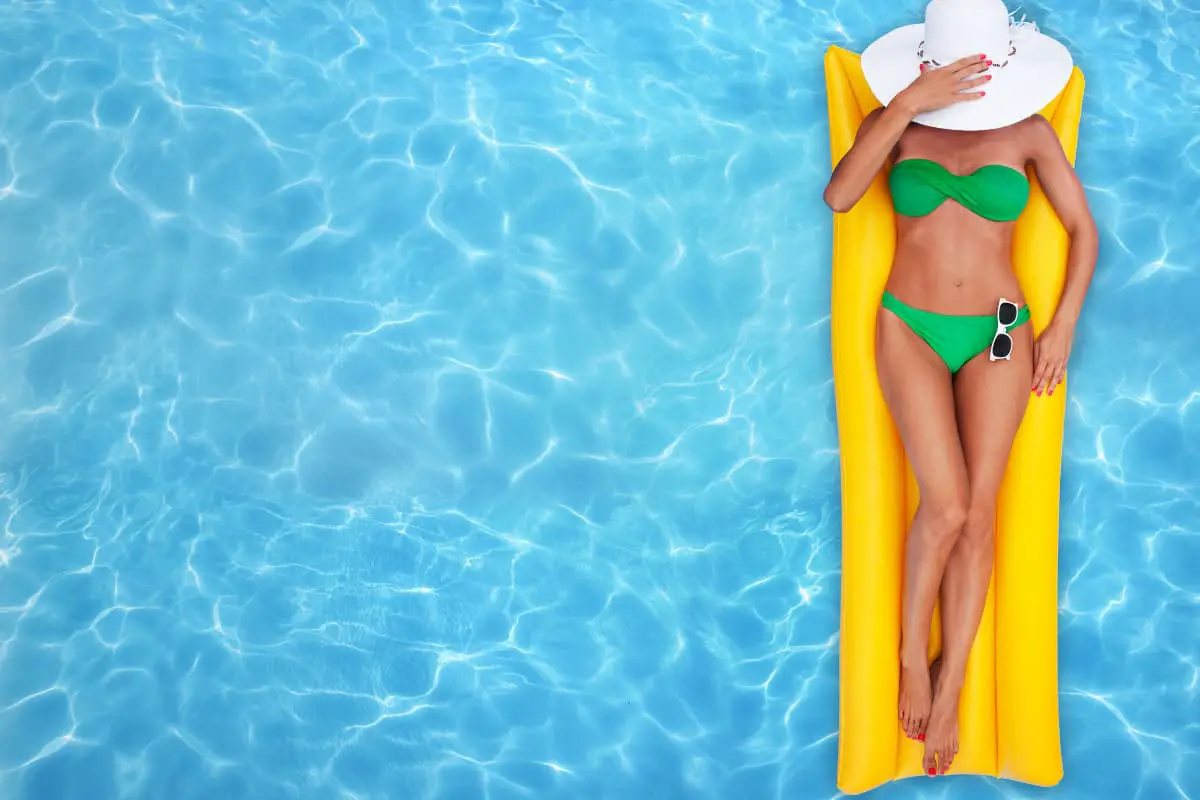
Experience the Best: Dive into Radiant Pools Today!
As an Amazon Associate I earn from qualifying purchases.
Installing a pool is a long and scary process and when you are planning on doing it yourself the task can be monumental. Even when you do decide to hire someone to do it for you, the costs, the benefits, the downsides, and challenges can be monumental.
Radiant pools were created to help as a more straightforward solution to the issues and answers that many pool owners were looking for. So what are the ins and outs, and what is the average cost of a radiant pool?
The cost of a radiant pool ranges from $9000 for above ground pools to over $25000 for pools that are sunk beneath the ground. Radiant pools can be cleaned with nothing but a skimmer and the right set of chemicals, with most radiant pools enjoying a large amount of care owing to the ease at which they can be maintained.
Many things need to be understood about radiant pools and how they work, with most people not always understanding the full benefits of the pool system.
Many pools around the world would benefit from the technology used in radiant pools, as most pools lose a lot of heat to the surrounding air or ground.
Radiant Pools are not just pools that were installed and left to the elements, these are pools capable of providing much more value for money.
What is a Radiant Swimming Pool?
A radiant swimming pool comprises two parts, the highly well-insulated walls, and the liner. The walls are the most essential parts of any radiant pool as this allows the pool to prevent any loss of heat that would typically be lost to the air or the surrounding ground.
Radiant Pools are available in various shapes and sizes and most of the time will be capable of being made into whatever you may need them to be.
This can be seen with the standard shapes and sizes in which radiant pools are available, with most radiant pools being adapted to satisfy the specific needs of pool owners.
A large part of what has decided the efficiency of radiant pools is the speed of installation as well, while even the fastest prebuilt pools can take up to a week to install. Radiant pools can be fully installed and filled with water within a day.
If you are building a standard above-ground, round radiant pool then the installation can be completed by two people within a few hours.
This has been a large part of why radiant pools have become so popular, as the movement to do things on your own has become popular, people want to be able to install even their pools without calling in an army of men.
What Are the Steps to Keeping a Radiant Pool Clean?
Like all large bodies of water, radiant pools do not stay perfectly clean throughout the year and require work to be done to keep them clean.
However, as the pool is capable of staying warmer for longer and has a lining similar to plastic several extra steps need to be taken.
These are all caused by people not being entirely aware of some of the sensitive parts of the pool.
Understanding how a radiant pool reacts to chemicals, cleaners, and the weather will greatly improve the overall quality of the water.
There are many times when the pool will change color because something is unstable, with most people quickly learning that the high heat abilities of the pool are a double-edged sword.
Warmer water means that things like growing a lot more than they do in cold, freezing temperatures.
Winter and summer covers
Your pool needs to be covered in the winter. Whether it is freezing or not does matter, as the pool will most likely not be used at all. Keeping a completely sealed cover on it will save you hours of headaches.
These are the thick, blue covers that you see most pools have, and not only do they keep the pool inside fresh and clean, but they also work wonders by keeping leaves, animals, and bugs away from the pool.
While in the summer months you may be tempted to leave the pool open at all times, and if it sees daily use you certainly can, it is advised to have a safety net over your pool.
These are nets that won’t keep leaves or small animals out of the pool, but they will work perfectly to keep children from falling into the pool.
This allows the pool area to be left relatively alone without having to stress when the next person may fall in.
Balancing chemicals
You must ensure that the pool chemical levels are almost perfect when using a radiant pool, simply because the lining can be sensitive to too acidic water.
A lot of first-time pool owners are not aware of the full effect that chemicals have on the water and the overall health of a pool.
The most important thing to remember is that if even one chemical is not present enough the pool will quickly fall out of balance, losing color and growing unwanted plants.
For radiant pools a slightly higher level of chlorine must be maintained as the water will be warmed up during the day, causing most if not all the free chlorine in the water to be soaked up by the sun.
Further, as the water is kept warm by the insulation a good time to add chemicals is at night, allowing everything to dissolve and get rid of unwanted growths when the pool is warm and ready.
Sucking up debris
In a regular pool, you may add the pool skimmer and allow it to go crazy, however with radiant pools, this may not always be perfect.
If you have installed the pool yourself then chances are the pool lining might not be perfectly flush. This can cause the automatic pool skimmer to be caught, which causes the skimmer to stop moving.
A further challenge that radiant pools face is the sheer walls, which means that the pool cleaner cannot automatically go up and clean it.
This is because normal pools have angled or rounded edges, which requires a lot of extra work when installing a radiant pool.
Not having rounded edges on the walls means that you have to sweep the pool sides regularly to stop algae from growing and becoming a problem.
Shock treating when required
A vital part of pools is having the chemicals being balanced and while this may be easy for traditional pools that are cold most of the time, radiant pools have the challenge of overcoming the constant heat that is kept in the water.
Many users have found that adding one bag of shock treatment once or twice a season helps keep everything perfectly leveled.
As the shock treatment has a large range of important chemicals, it saves you time and money from adding these in when it may be too late.
Shock treatments are brilliant ways to re-stabilize a pool after it has been left to stand for months on end, with most pools enjoying a few extra chemicals being added after being left for winter.
This kills any dormant plants and bacteria that may be lurking in the waters, with a large number of pool owners preferring to use shock treatments instead of relying on adding chemicals one by one.
Run pump system
This is important for all pool systems, running the pool pump and filtration system for 7 hours in the summer and 4 hours in the winter is the only real way to ensure that nothing goes bad.
The pool filtration system is vital to keeping the water moving and healthy while circulating the chemicals that you have added. Even in the dead of winter, if your pool is not frozen then you should be running the filtration.
A big problem that many pool owners experience is the rapid turning of their water over the winter months with most suffering extreme algae growths when it comes to early spring.
This is because the filtration system has been left to sit and rot, which can happen even in the dead of summer. Filtration systems are built using PVC piping and will bake in the winter sun, creating the perfect location for bacteria, algae, and even bugs to thrive in.
What are the steps to installing a radiant pool?
While installing a radiant pool on paper seems simple, in practice it can be quite a challenge as the pool requires a lot of preparation work to be perfect.
A large amount of work needs to be done before the pool is removed from its packaging, with most people working the hardest on making the ground under the pool level.
Before we start the basic process it is important to remember that radiant pools can be anything from fully above-ground pools to inground pools.
If anything, this shows the flexibility of the pool system, as the parts used to build either of these are the same, with most people preferring to have partially sunk in radiant pools.
This allows for easy leveling and decking to be installed around the pool for easy access.
Above the ground radiant pool
If you are installing the radiant pool on your own this is the easiest type of pool to build, with a minimal amount of work required to get everything level.
A lot of people have started to compact the ground underneath the pool before starting the installation, while the creators of the pool recommend at least adding a layer of the smooth ground beneath the pool.
- Mark out area: Once you have the pool size and dimensions you need to mark out the area where you want the pool to be. If you are doing it yourself it will act as a guide for the next step, or it will work as the guide of the team you hired to install your radiant pool.
- Remove ground/grass: After the area has been marked out you need to remove the layer of topsoil where the pool will be. This includes removing any grass, rocks, and soft topsoil that will be present. Most likely this will be a rounded shape as most above-ground radiant pools come in standard shapes and sizes.
- Level pool: The most important step in preparation is making sure that the pool is level, which can be anything from compacting the ground and using laser measurements to simply using tiles. The pool walls do not have to be perfectly flush with the ground, with any holes being filled in later. Ensuring the pool is perfectly level is the only way to ensure that the walls all have the same amount of pressure.
- Start constructing walls: Once the ground is cleared and ready you need to start assembling the walls, which all slot together with a pressure slider system. This is the part where two people are a must as you will be creating the full shape of the pool at this moment. The walls will all easily fit together and create a good seal and structure for the lining to rest on.
- Install nozzles: You will see that there are several pre-drilled holes throughout the walls of the pool. You need to use these to connect what will become the nozzles of the pool, using included threaded kits to securely connect them.
- Install skimmer plate: The most important part to add now is the skimmer plate on the side of your pool. This is the large rectangular piece on the side of the pool wall that requires you to put a mounting plate, backplate, and a lot of screws in the right places. It is highly recommended that you use an electric drill for this as turning the screws by hand can be a bit troubling.
- Install the liner: Once the skimmer, nozzles, and walls have all been installed you need to install the clip plates at the top of the pool walls. It is into these that you will be hooking the liner, using either a vacuum or water to ensure the lining is perfectly flush with the walls and the ground of the pool.
- Fill with water up to skimmer plate: If you are not using a vacuum seal then you need to fill the pool up to the first nozzle or skimmer plate, the water’s weight will automatically push the lining flush. Once the water has reached the right height you will install the remaining parts of the skimmer plate and nozzles.
- Cut out vents and skimmer plate: Using a sharp Stanley knife to cut through the lining to make the skimmer plate and nozzles open. This lets the water eventually flow in and out of the pool through the pump system, usually being a more complex paper filtration system rather than the traditional sand filter systems.
- Install pump: Before filling the pool you need to connect all the pipes, fittings, filters, and pumps of the filtration system. This comes in more flavors and options than pools and will rely entirely on the system that you chose to go with.
- Fill with water: Now that everything has been installed, all the parts are working, the lining is flush, and the pumps are working you need to fill the pool with water. This water level is just above halfway up the skimmer plate. Once the water has been filled the pool should be ready for you to swim in, with most pool water enjoying some chemical treatment before being used entirely.
Inground radiant pools
Inground radiant pools are slightly different from their above-ground cousins, with most inground pools being entirely custom.
You will most likely not be able to build these pools on your own within a day, however, if you hire a professional team they can still finish the pool installation within two days.
Inground pools allow you to also install water heaters, hot tubs, and a few other luxuries that above-ground pools do not have the support to allow.
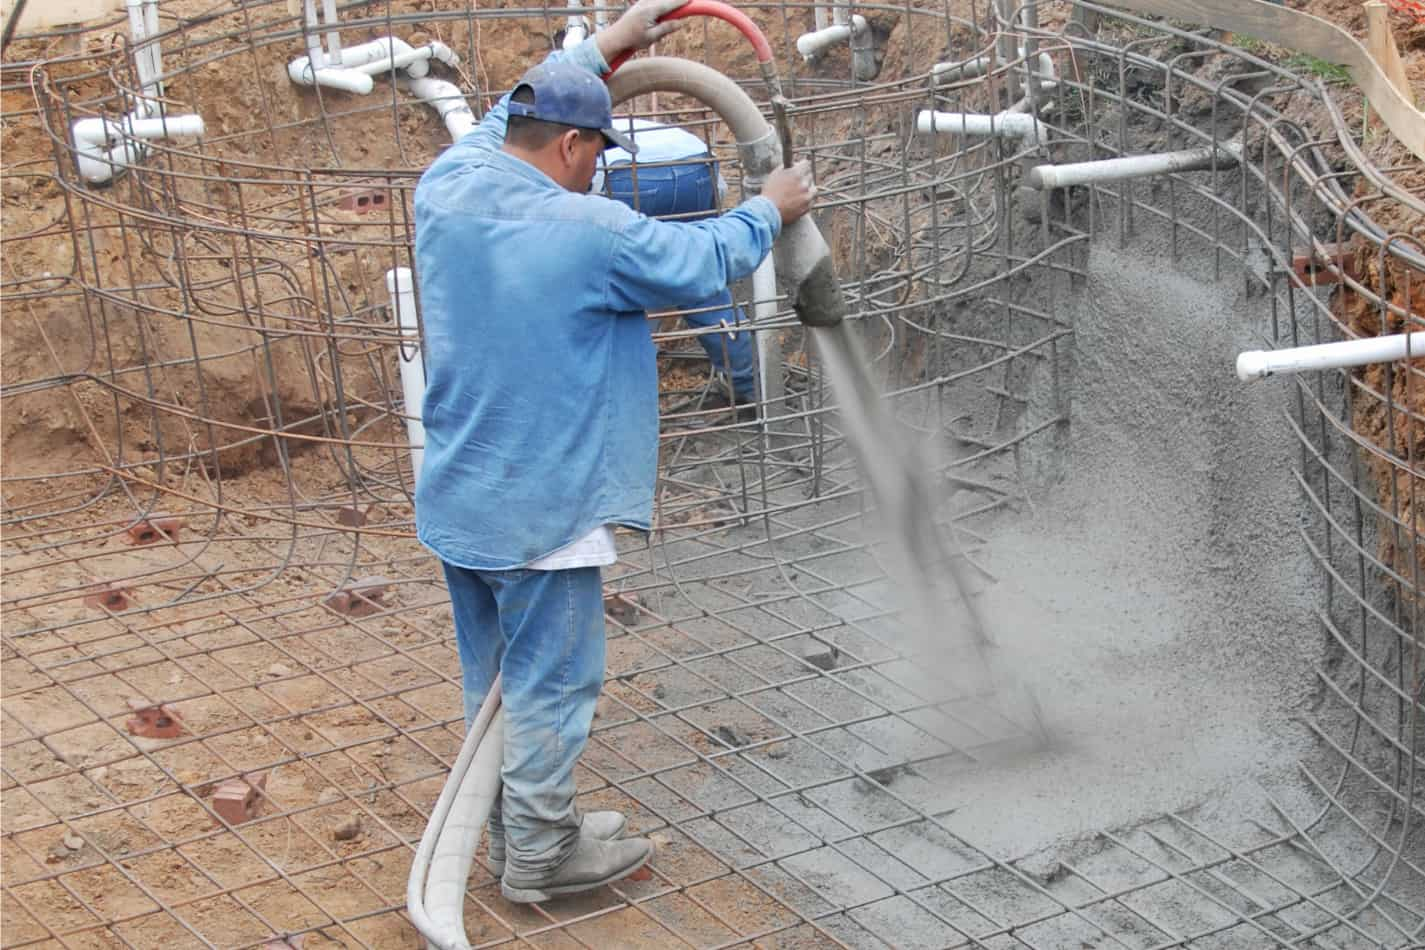
- Dig pool location: The most radically different part of inground pools are the giant holes that need to be dug to allow for them. This can be done with a shovel, however, that usually takes up to a month to complete. Using excavator equipment, a professional company can have the right hole dug within a few hours and start building your pool before the end of the first day.
- Level ground: The ground being level is not as important for inground pools as they are for above ground pools. This is because inground pools are usually given a shallow and deep end, with the pool walls being supported by the ground around them.
- Build frame: Building the frame for inground pools require a lot more work and will have pool builders focusing more on getting everything complete almost entirely. As radiant pool walls are almost all that is necessary there are no support structures built, not insulation being sprayed, and no waiting for days on end for the concrete the settle and dry.
- Follow steps 5 through 11: Once the walls of the inground pool have been built then the process of the pool is remarkably similar to that of an above ground pool. The same steps should be followed to install the lining, add the skimmers, the nozzles, and the filtration systems.
How Much Does a Radiant Pool Cost on Average?
There are several costs associated with radiant pools that need to be understood before choosing between getting one.
Most people look at short-term costs, forgetting that radiant pools can outlast most of the other pools without ever needing to be replaced or significantly fixed.
Using the high-tech technology that radiant pools have, they have become a lot more permanent in the world of pools than other types.
A radiant pool has three points of high expenditure throughout its life, understanding the total costs of each one is what will allow you to decide on getting one or leaving it as a fantasy.
Most pool owners see the upfront costs of some pools and are ready to give up and choose something cheaper without realizing that long-term costs can make even the wealthiest of men cry.
Installing the pool
The upfront installation costs of any radiant pool are the highest cost, this is because it requires both man-hours to be installed and a large sum of money to buy the pool parts as well.
A standard round radiant pool will cost between $12000 to $22500 to install, with the size greatly affecting the overall price.
However, if you are planning to install the entirety of the pool on your own then the price can easily drop by several thousand.
While inground, custom pools can see the price skyrocket to well over $30000, making even the environmentally safe, insulation heavy, high-tech radiant pool a hard pill to swallow.
It is this high up-front cost that has made radiant pools so slow to catch on, as even a basic concrete pool with a lining can cost just under $5000.
Learn How to Manage Your Pool and Hot Tub
Frustrated trying to keep your pool clear? Feeling confused about when to add the right chemicals? Get the perfect easy-to-use, illustrated ebook and video course today!
Keeping the pool clean
To keep a radiant pool, clean the costs are almost the same as any other pool, with a monthly cost of around $100 to $200, depending on the seasons.
As the pool becomes more permanent and the balance of chemicals that you have in the pool is more normal the pool will naturally cost less to take care of.
A few people prefer to let their radiant pools run empty during the colder months, as the pool walls are above ground they do not need to worry about being pressed in by soil.
Having the pool empty when it is no longer used means that you can easily save several hundreds of dollars when the weather is too cold to allow for even dipping a toe in the water.
Maintaining the pool
Apart from keeping the pool clean you may find that the lining becomes damaged over time, the walls of inground pools may crack, or there can be accidents that happen.
This is one of the areas where radiant pools can shine far above the rest, as the pools are modular and allow you to fix parts that are getting old or need to be replaced.
This can cost anything from a few hundred dollars for piping systems, to well over $4000 to replace panels of the pool wall or getting a new liner.
However, you will save thousands of dollars by not needing to remove the pool almost entirely to fix one crack, hire people to assess the damage or even have someone hammer and chisel away parts of the concrete pool.
What makes a radiant pool special?
Radiant Pools are the only pools that are Energy Star certified, uses recycled materials, have almost perfect insulation, and can be built using a modular system.
This combination of things has made radiant pools the frontrunner in green pool technology and many pool installers around the world are starting to recommend them.
A large part of the appeal of radiant pools is the small amount of manpower needed to install them, with allows pool companies to have smaller crews at installation areas.
This means these companies can do more business daily, installing pools at multiple locations instead of just at one house each week or month.
For consumers, radiant pools and their great insulation means that you do not need to worry about cold water even on the hottest days, giving you up to 2 months of extra swim time.
A large part of the appeal for more technical owners is the ease at which the pool can be repaired, not requiring years of knowledge of each component to properly replace them.
Learn How to Manage Your Pool and Hot Tub
Frustrated trying to keep your pool clear? Feeling confused about when to add the right chemicals? Get the perfect easy-to-use, illustrated ebook and video course today!
Final Thoughts on Radiant Pools
Radiant Pools are the future pools as they use space-age technology to keep the heat of the water in the water, allowing pool owners to swim in hotter water for much longer than they ever planned.
You must know everything about these pools, and we’ve done our best to list the costs and risks of owning a pool built in sections.
Just be sure that no one drives into the pool when it’s filled with water, no one wants to end up on the internet while being swept off their feet!